Showing posts with label Samsung Galaxy. Show all posts

Wednesday, January 15, 2020

How to Transfer Text Messages from Samsung Galaxy to Computer

Nowadays, most of the people are using WhatsApp text messing instead of text messages. Mobile phone messaging has been replaced by Applications like WhatsApp messenger, Facebook Messenger, etc. With the use of these applications, you can send a message, voice notes, pictures, videos, and documents too.

Samsung Galaxy devices have a large screen making them more accessible to text messages. However, it also takes your device storage when you are continuously connected to your friends or relatives. So we need to backup up our message into your computer. Here are some methods that can help you to backup your message into your Computer.
Method to Transfer SMS from Samsung to Computer
  • First Smart Switch for Personal Computer
  • Second Android Manager application
First: Smart Switch for Personal Computer
Smart Switch is one of the most-used apps to transfer SMS from Samsung Galaxy Phones to your computer. With Smart Switch, you can backup all the things from your phones to the computer including pictures, videos, documents, etc. There is some disadvantage you may have heard regarding your data getting infected by various Malware. However, all these are wrong accusations that needs to be ignored.
Here are some easy steps to help you to transfer your data.
  1. You have to download Smart Switch and install it into your Computer. You can download it from Samsung Websites.
  2. After installation, launch the Smart Switch into your PC. Here you have to back up your data into the Computer.
  3. Attach your USB Cable into your Samsung phone to connect your Computer.
  4. Here you can Tap on the Backup icon shown into your computer screen.
  5. Data Backup will start in some moments from your Samsung phones to your PC.
  6. Tap on the OK icon when your data transfer has been done.
Second Android Manager application
You can also take a hard copy of your message and see it on your computer screen. First, you have to download the Androidphonesoft software. Android Manager is one of the best applications to choose from as it has the most advanced tools.
There are no limits to sending your SMS into your Computer, and it can store all of your data transfer from your mobile.
Samsung Smartphone supported by Android Backup
  • Samsung Galaxy S10 and S10 plus
  • Samsung Galaxy S9 and S9 Plus
  • Samsung Galaxy S8 and S8 plus
  • Samsung Galaxy S7, S6 and S5
  • Samsung Galaxy Note 10, 9, 8, and 7
  • Samsung Galaxy J series and A series
How to download and install Android Manager
First, you have to download Android Manager software From Samsung Website and install it into your Computer.
Attach Samsung Galaxy Smarts phones to Computer
Connect your Samsung Phone to your PC through the USB data cable. After connecting your phone to the PC, you have to Hit on the OK button shown on your smartphone.
After that, the software automatically detects your device and start to transfer your SMS into your computer.
Kellie Minton  is a self-professed security expert; he has been making the people aware of the security threats. His passion is to write about Cyber security, cryptography, malware, social engineering, internet and new media. He writes for Norton security products at norton.com/setup.

Wednesday, March 13, 2019

How to Change the Bixby Button Function on Samsung Galaxy


                                             source :- Samsung Galaxy
Many users want to disable the Bixby button of their Samsung Galaxy. Although, some want to use the button but want it to launch something that they want. Yes, you can do this with your Galaxy Bixby button. There are a few different ways to do this including rooting. However, rooting is a little complicated, so instead of this, you can use an application called Bixby Button Remapper. The app is available on Play Store and free to download. This is the easiest method for changing the Bixby button function on Samsung Galaxy.
Use the below guidelines to change the Bixby button function on your Samsung Galaxy easily and correctly.
First, check that the Bixby is fully enabled on your Galaxy or not. If not, then before proceeding, you have to enable it completely. When it’s done, go to Play Store and download ‘Bixby button Remapper’ on your Samsung Galaxy.
Here are the complete steps:
Steps for setting up Bixby and download Bixby button Remapper.
  1. Launch ‘Bixby’ on your phone.
  2. And complete setting it up.
  3. Tap on ‘Settings’ icon of Bixby at the left top corner.
  4. Turn on the ‘Bixby key’ toggle switch, if it is not.
  5. Then return to ‘Homescreen’ of your phone.
  6. And launch the ‘Google Play Store.’
  7. Tap on the Play Store search bar.
  8. Type ‘Bixby button remapper’ into it and start searching.
  9. Look the “Bixbi Button Remapper-bxActions”, “Bixby Button Remapper-bxActions’, or “Bixbi Button Remapper-bx Actions” from the results. All are the same app with white ‘b’ on a green background icon.
  10. Tap on the ‘Bixby button Remapper’ app.
  11. Then tap on the ‘Install’ button on the app page.
  12. Confirm installation with ‘Accept.’
  13. Wait and open ‘Bixbi button Remapper’ after downloading.
  14. Start with the bottom ‘Next’ button.
  15. Tap on ‘Get foreground app.’ To work ‘Bixby button Remapper’ properly you’ll have to do few settings, tap on first ‘Green button’ to view the video for settings.
  16. Tap on blue ‘OK’ button at the bottom of the video to launch settings menu.
  17. Then tap on ‘bxActions’ option at the middle.
  18. Turn on ‘Allow usage tracking’ by tapping on its toggle switch.
  19. Next, tap on the second green color ‘Get button events’ button.
  20. Tap on blue ‘OK’ button at the bottom of the video to launch settings menu.
  21. Scroll down to the Accessibility settings section.
  22. And tap on ‘bxActions-Bixby button.’
  23. Turn on toggle switch next to ‘Off’ to turn on Bixby button.
  24. Enter your ‘Phone or Unlock password,’ when asked.
  25. Tap on ‘Bixby Button’ or first tap on ‘Action’ then ‘Bixby Button’ to choose a new action for Bixby button.
  26. Tap on ‘Standard action’ to open the actions list.
  27. Then select a ‘new action’ from the actions list.
There are various actions in the list. You can turn your Bixby button into the back or home button, media button like play/pause, Google Assistant, Google Now, dialer or camera launching button. You can also set Bixby button of your Samsung Galaxy to open Settings, Task manager, power, notification or launch any specific app.
That’s it! To disable and stop the Bixby button remapping, launch the ‘Bixby Button Remapper’ app and turn off the ‘Bixby Button’ toggle switch.

Karen Minton  is a creative person who has been writing blogs and articles about cyber security. She writes about the latest updates regarding mcafee.com/activate and how it can improve the work experience of users. Her articles have been published in many popular e-magazines, blogs and websites.

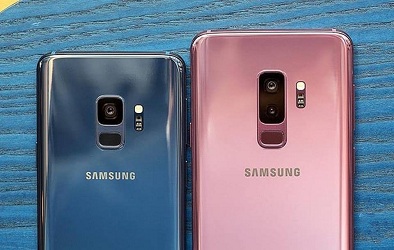
How to capture screenshot on Samsung Galaxy S9 and S9+


                                   source :- Samsung Galaxy S9and S9+
Capturing screenshot on Samsung Galaxy S9 and S9+ is a breeze, and this can be done in multiple ways. Here you will get some simple and easy methods to choose from. Some of them also work on all brands of Android phones, where some of them are exclusively for Galaxy phones.
Here are five easy ways to capture screenshot on Samsung Galaxy S9 and S9+
  1. Capturing through Buttons
  2. By palm swiping
  3. Using Smart capture
  4. Through Bixby
  5. Via Google Assistant
Capturing through Buttons
This is the most common and straightforward method for capturing a screenshot, on all brands of Android smartphones. Just use the power button and volume down button of your phone simultaneously, wait for a second and the screen will get captured.
Steps:
  1. Open the screen you want to save as screenshot.
  2. Now, tap and hold power and volume down button together.
That’s it! Screenshot captured.
By palm swiping
Capture a screen with just palm swiping over it. Only you’ve to do is swiping your palm across the complete screen from left to right side or right to left.
Just the feature should have to be enabled from settings. Open settings and check it.
Steps to enable palm swipe to capture screens:
  • Go to ‘Settings.’
  • Then ‘Advanced features.’
  • And enable ‘Palm swipe to capture.’
Steps for taking a screenshot:
  1. Open the screen you want to save as screenshot.
  2. Now, swipe side of your palm across the screen from left to right side or right to left.
That’s it! Screenshot captured.
Using Smart capture
The Smart Capture feature of Galaxy S9 and S9+ instead of just capturing a screenshot, this feature will also allow you to capture the complete web page or a window.
Start by using a common screenshot method either capturing with buttons or swiping the side of your palm across the screen. Once you do this, tap ‘Scroll capture’ option from the bottom of the screen and continue tapping to go down and capture the whole page. But, before using you have to enable the feature the from the settings of your Galaxy S9 and S9+.
Steps to enable Smart capture:
  • Go to ‘Settings.’
  • Then ‘Advanced features.’
  • And enable ‘Smart capture.’

Steps for taking a screenshot:
  1. Open the screen you want to save as screenshot.
  2. Use the first (Using buttons) or second (Palm swiping) to start capturing the screenshot.
  3. Wait and tap on ‘Scroll capture’ option at the bottom of the screen.
  4. Continue tapping the ‘Scroll capture’ button to capture the complete page.
That’s it! Screenshot captured.
Through Bixby
Bixby of your Galaxy S9 lets you capture a screenshot by simple voice command. Just launch the Bixby and ask it to “Take a screenshot.”
  1. Press and hold the Bixby button of your Galaxy to launch.
  2. And say, “Take a screenshot.”
Or
Enable the Bixby voice wake-up from the settings to launch Bixby by simply calling “Hi Bixby.”
Steps to enable Bixby voice wake-up:
  1. Go to Bixby home.
  2. Then go to ‘Settings.’
  3. Select ‘Voice wake-up.’
  4. And enable it.
Steps for taking a screenshot:
  1. Open the screen you want to save as screenshot.
  2. Say ‘Hi Bixby.’
  3. Then say, “Take a screenshot.”
That’s it! Screenshot captured.
Via Google Assistant
Other than Bixby, you can use the Google Assistant of your Galaxy S9 and S9+. Google Assistant also captures the screenshot with voice command.
Steps for taking a screenshot:
  1. Open the screen you want to save as screenshot.
  2. Say “OK Google” or hold the ‘Home’ button to launch the Google Assistant.
  3. Then say, “take a screenshot.” You can give command through the keyboard.
That’s it! Screenshot captured.


Karen Minton  is a creative person who has been writing blogs and articles about cyber security. She writes about the latest updates regarding mcafee.com/activate and how it can improve the work experience of users. Her articles have been published in many popular e-magazines, blogs and websites.

McAfee Vs. Kaspersky Internet Security

  McAfee and Kaspersky are well-known names in the antivirus circle. It’s not wrong to say that they can be considered giants in the online ...