Thursday, October 31, 2019

How to Tweak Email Viewing Settings on Yahoo Mail

You can customize how you want to view the emails in your Yahoo Mail inbox. There are several ways in which you can modify the look and appearance of the inbox. It will make your inbox better, attractive, and more personalized. Continue with these simple steps to know more:
Customizing the Email Settings from the Settings Menu
  1. Launch your web browser and type yahoo.com in the search bar at the top of your browser. It lets you enter the Home window of Yahoo.
  2. Now navigate to the “Mail” tab located at the upper-left portion of your screen inside the purple-coloured bar.
  3. Then hit the “Mail” tab to open the sign-in window of your account.
  4. Hit the mail text box. Then type your email address. Now tap the password box to enter your secure password. After providing all the necessary login details, tap the “Sign In” button to proceed.
  5. After logging into your account, tap the gear-shaped settings icon located inside the menu bar which is present on your mail window.
Managing Email Settings
1. Look for the default menu icon to see your email settings. You need not go to other tabs in order to modify these commands. 
  • Here you may be able to see two checkboxes to enable conversations or to show snippets. In case you have marked on the first one that reads “Enable Conversations”, it means that the message will be enabled.
  • The second one says that you will be able to view a snippet of the messages before tapping on any of it. 
  • You may manage any checkboxes by marking them.
2. Then go to multitasking settings. Here you will see two radio buttons that read as “Tab”, and the other one is “Recent”.
  • In case you select the “Tab” radio-button, you will be able to view all of your emails.
  • In another case, if you hit the “Recent” button, you will be able to view all of your recently opened emails with the help of a pull-down menu tab.
3. The next option is “Preview Pane” to manage the preview location in the form of a pull-drop list. Usually, it always set to “None”. By clicking on this menu button, you may choose from the given three options- “None”, “preview pane on the bottom” and the last one is “Preview Pane on the right”. You may select one of these choices from the list.
4. The next is “Message List Density” option. It fixes your email density like spacing and appearance of your message. It will also provide you with three main options which read:
  • Regular
  • Slim
  • Relaxed
You may select any of these from the pull-down list available there.
5. Now go to the “Mark as read” settings. It will show you four options to determine the time span of marking your emails as:
  • Immediately
  • In 2 seconds
  • In 5 seconds
  • And the last one is: Never.
You may select any of these options from the pull-drop list.
6. Now tap the moving message option from the pull-down list. It also has two options:
  • Show the next email
  • Go back to the original folder
Choose any of these options provided under the pull-drop menu.
7. Then hit any of the radio buttons to select your email version. You will be provided two options. The first one is “Full- Featured”. It will provide you with full control over various features and functions of Yahoo mail. The next one is “Basic” which will give you only normal functions and features which can be accessed under slow internet connectivity.
8. Finally, click on the blue coloured “Save” button to save all your settings after ensuring that you have customized your email settings correctly. The save tab is located at the lower-left portion of your customizing page.
Daisy Martin is an avid technical blogger, a magazine contributor, a publisher of guides at norton.com/setup and a professional cyber security analyst. Through her writing, she aims to educate people about the dangers and threats lurking in the digital world.

How to Pair a PS4 or Xbox One Controller to iOS Device

PS4 and Xbox One S are the most popular video game consoles. Apple has recently rolled out Xbox One and Playstation 4 controller support for iOS and Apple TV. If you want to play games on your iOS device from your controller, then here is how you can pair them.
Pairing DualShock 4 Controller
  1. First of all, open the Settings app on your iOS device. It appears like a geared shaped icon and is of a gray color.
  2. Hit the “Bluetooth” tab.
  3. Next, navigate to the “DualShock 4 Controller”.
  4. Now you have to hold down the PlayStation & Share tab for few seconds in order to get into pairing mode. After a while, the lights will start to flash white.
  5. Then you will see the “DualShock 4 controller” appearing in the “Other Devices” section under your Bluetooth device options.
  6. Now you have to choose the “DualShock 4 Controller” option from the list to link/pair it.
  7. Once the controller is paired, you are eligible to play various games that you wish.
  8. You may check your battery performance and its level under the widget section.
Pairing Xbox One S controller
  1. First of all, you have to go to the “Settings” application and then tap on it to open.
  2. Now hit the “Bluetooth” tab.
  3. Just press the Xbox button to power on the mode by navigating to the Xbox One S controller.
  4. Next, go to the Xbox One S controller option and turn it into the pairing mode by pressing and holding down the “Connect” tab located at the upper portion of your screen. Here you have to tap it for up to three seconds.
  5. Then the controller will appear in front of you as the “Xbox Wireless Controller” located under the “Other Devices” tab.
  6. Now hit the “Xbox Wireless Controller” to start the pairing process.
  7. When your controller gets connected with the Apple device, you may play any game.
Unpairing DualShock 4 & Xbox One S controller
  1. Open the “Settings” application. It is just like a geared- shaped icon.
  2. Hit the “Bluetooth” tab now.
  3. Go to the device listings and look for both controllers options – DualShock 4, and the next is Xbox One S.
  4. After that, hit the “i” tab.
  5. Now choose “forget this device” option.
  6. You may also detach your device in order to save battery power.
6. Now press the “Ok” tab to verify your unpairing process.
7. In case you think of pairing your device again in the future, you may follow the pairing procedure to get it connected.
Daisy Martin is an avid technical blogger, a magazine contributor, a publisher of guides at norton.com/setup and a professional cyber security analyst. Through her writing, she aims to educate people about the dangers and threats lurking in the digital world.
Fix Apex Legends Crashing Problem in PC

Reasons Apex Legends Crashes
According to the reports, there is no particular reason behind it. But some of the common causes are listed below that you can check to learn about the hassle in a better way. Those are:
  • Sometimes, full-screen optimization creates a problem while playing the game. So, it can be a reason behind crashing Apex Legends.
  • Some game elements require administrative privileges to work correctly. Otherwise, it might cause a problem in the game while playing it.
  • As we know, Apex legend is a new game, which might not work correctly on PC with outdated graphic drivers.
  • While installing the game, there might be some necessary file missing that can create a problem for the user.
  • The small size of the virtual memory file can also create problems while installing or playing the game. So, make sure to increase it specifically for the game.
  • Minimizing the game using the Alt + Tab button might be causing hassle. According to the reports, this is considered as a bug with the apex legends.
How to Resolve Crash Problem in Apex Legends?
Disable Full-Screen Optimization:
  • Right-click on the Apex Legends game icon.
  • Tap Open File Location. You will see the game installation folder.
  • Find “r5apex.exe” and right-click on it to select Properties.
  • In properties, tap on compatibility and tap on Disable full-screen optimizations box.
  • Apply the setting and Ok to confirm it.
  • Now run the game to check problem is resolved or not; otherwise, move on to the next solution.
Granting Administrative Privileges:
  • Rick click on the game icon and select Open file location.
  • In the installation folder, find “r5apex.exe” and right-click to open properties.
  • Go to the Compatibility section and select Run as an Administrator box.
  • Apply and Ok to confirm your settings.
  • At last, run the Apex legends game to see if the issue persists.
Verifying Game Files:
  • Open the Origin client.
  • Sign in to your account.
  • Now, tap on the Game library option available on the left side of the screen.
  • In the Game Library option, right-click on Apex legends game and choose the Repair game option.
  • After that, the client will start the process to verify the game files.
  • Once done, it will download the missing or corrupted files, if any, automatically in the game.
  • Lastly, start to play the game to verify if the problem is resolved or not.
Daisy Martin is an avid technical blogger, a magazine contributor, a publisher of guides at norton.com/setup and a professional cyber security analyst. Through her writing, she aims to educate people about the dangers and threats lurking in the digital world.

Wednesday, October 30, 2019

Guide for Instagram Influencer Marketing Strategy In 2019

Undoubtedly, Instagram has become one of the essential marketing platforms that brands use to lure prospective audiences. When it first started in 2010, it was used to share images just like other social media platforms. But it has evolved and become a platform crawling with marketers, influencers, and brands as well.
What is Instagram influencer marketing? Well, it is a form of business collaboration. It is mainly used to promote something like a product, campaign, or services. Most importantly, a social content creator with niche audiences provides more valuable target audiences as compared to celebrity endorsements. In other words, brands use the product as a gift for the celebrity and get visibility by posting about it in return.   
How To Find Best Instagram Influencer For Your Brand?
As we know, Instagram influencer allows brands to reach out to their targeted customers in a genuine way. Nowadays, there are hundreds of thousands of brands and people try to find the best Instagram influencer. But they end up facing trouble due to a low level of knowledge about them. So, follow the listed below instruction learn how you can locate a better option to boost the visibility of your brand.
  • Influencing audiences is based on three components, such as Relevance, Resonance, and Reach of your brands and their products or services.
  • Relevance influencers can support your brands by providing content to targeted audiences related to your company or business.
  • Resonance support business by getting the potential levels of engagement relevant to your brand conveniently.
  • You also need to form an effective and efficient tactic, which will help to make contact with the right people audience using the right campaign tools.
  • Also, the audience needs to trust their influencers. Otherwise, it will make an adverse impact on your brand.
  • Trusting the opinion of influencers is the key to reach success without having to worry about anything.
  • Top Instagram influencers attain tons of offers from various brands or companies. So, you need to put in the time to find a better option according to the budget.
All in all, the detail mentioned above regarding locating Instagram influencers for your business can help you to reach out to targeted audiences conveniently. It is also advisable to reach out personally and privately to deal with the influencer for partnership. With this, the brand can easily target millions of potential people effortlessly.
Daisy Martin is an avid technical blogger, a magazine contributor, a publisher of guides at office.com/setup and a professional cyber security analyst. Through her writing, she aims to educate people about the dangers and threats lurking in the digital world.

Skip to content Home Disclaimer Privacy Blog How to Set Parental Controls on PS4?

PS4 fame is growing enormously and luring tons of kids towards it. Due to this, many parents are facing a problem with the playtime and content present in the game. So Sony allows a suite tool available into the PS4 ecosystem that lets you protect your child while playing games. There are many reasons why you should apply parental controls. Some of them are setting a limit on how long and when your child can play, the age restriction to 18+ content, and many more. However, some parents don’t know how to set parental controls on PS4. Follow the given below instructions to protect your child by setting up parental control conveniently.
Set Up a Family Account on PS4
First of all, you need to create a child account on the console. It will give you the ability to control everything on PS4, which includes:
  • Setting age restriction
  • Set time limits
  • When and how long your child can access the PS4
  • Choosing what type of games to play and many more.
Add a Child Account:
  • Use Parent account to log into the PS4
  • Go to the Setting, parental controls and then Family management
  • Enter your PSN account password
  • Tap Add Family Member and then click on Create User
  • Now provide your child’s name, date of birth, and choose next.
  • Read and accept the term and condition to confirm it.
Set Age Rating Restrictions on PS4
  • Use Parent account to log into PS4.
  • Go to the settings, parental controls, and then family management option.
  • Fill your PSN password
  • Choose the child account and heads to Application, devices, and then network features.
  • At last, apply a blanked age restriction to the content or on games accordingly.
Restrict Play Time on PS4
Restricting playtime can support your kids to focus on outdoor stuff, as well. So, if you want to limit the playtime of your kids, then all you need do is check listed below points.
  • Log into your account and enter your password.
  • Choose your child’s account
  • Now set the time zone according to your country.
  • Choose a playtime setting. Doing so, you can set a time limit on how long your kid can play.
  • Hit the Save button to apply the changes.
Set Restriction via PlayStation Application:
You can also arrange the playtime restriction with the support of the PlayStation mobile applications. Just follow the instruction to learn how to do it.
  • Open the App or Google play store to download the PlayStation application.
  • Log into your parental account and enter your PSN password.
  • Click on the PS icon available at the bottom side of the screen.
  • Choose Setting and then go to the Account information.
  • Select the Menu icon accessible in the top-left part of the display.
  • Tap on the Family Management and choose child account.
  • Tap on Edit available next to the Playtime restrictions option.
  • Press save and apply and set the new restrictions.
Kellie minton is an avid technical blogger, a magazine contributor, a publisher of guides at mcafee.com/activate and a professional cyber security analyst. Through her writing, she aims to educate people about the dangers and threats lurking in the digital world.

5 Best Outlook Tips and Tricks for Enhanced Productivity

There are millions of people who use Microsoft Outlook for managing their email and calendar. However, users are not entirely aware of its advanced functions and features. Gaining some tips and tricks regarding Outlook will help you in synchronizing your work efficiently. Here are the tips, which will help you handle emails and appointments conveniently.
Tips and Tricks for Boosting Efficiency
  • Try to avoid repeated typing:
Quick Parts is a better option available in Outlook to save time from using the same text over and over again. To do so, all you need to do is highlight your text in the composer window. Now, move it to the Insert tab and tap on the Quick parts. Select the Save selection option to the Quick part gallery. In doing so, you will be able to see a popup suggestion of using the text. Make sure to use it and save your time by typing quickly.
  • Show the group message together:
Tracking down a piece of relevant news is a difficult task when you receive tons of emails together. But Outlook can help you in the hard part just by grouping email into the conversation. So, you can locate messages according to your desire quickly. Apart from this, users can also allocate third-party apps to make a custom inbox to prioritize messages. It also allows filtering essential emails if they are placed in different folders.
  • Automatic recurring filing and tasks:
Create a single home tab with the help of Quick steps and save time by performing your daily task on Outlook. It allows users to fabricate a custom series of steps, which can delete, categorize as well as flag messages in a single click of the mouse.
  • Schedule Outlook messages or emails: 
Outlook has a feature that allows you to send messages in the near future. For that, all you need to do is type your email, and then choose the Options tab to select the Delay Delivery button. A dialogue box will appear on your screen where you need to enter the date and time accordingly. At last, hit the send button and your email will be held until the specified time and date for delivery.
  • Send text SMS from Outlook:
People can send text messages directly from Outlook to your contacts. It just needs to register with a third-party messaging service to activate the option. To utilize this option, tap on the New Items present in the Home tab, then choose Text Message. In doing so, a new dialog box will appear on the screen. Click on it to locate text messaging service for your mobile phone operator.  
Find relevant emails using the filter option:
You can easily find your specific email by using the filter option. Just go to the Home tab and click on the Filter email option. After that, select menu option that will display filters such as attachments, unread, specific date, or time. It is one of the best options that one can utilize to locate relevant emails without facing too many problems.
Kellie Minton  is a self-professed security expert; he has been making the people aware of the security threats. His passion is to write about Cyber security, cryptography, malware, social engineering, internet and new media. He writes for Norton security products at norton.com/setup.

Wednesday, October 23, 2019

How to relabel Chromebook’s keyboard

Ever since its introduction in 2011, Chromebook has become one of the most-demanded laptops/tablets all over the globe. The device runs on a Linux designed Chrome OS in the operating system department. No matter how you look at it, Chromebook is distinctly different from your traditional laptops, and we do not mean due to OS only.
The most distinct physical difference would be the Chrome feature keyboards. It halls a wide variety of Chrome-designed functions that replaces numerous keys such as F1 and Caps Lock. Depending on your work style, this could either be really handy or equally disastrous.
In case you are not pleased with Chromebook’s keyboard arrangement, then do not falter as we are here to help you out. There are a handful of changes you can apply to your Chromebook to significantly enhance your performance.
Begin with heading into the Keyboard window under the Chromebook’s settings tab.
  1. Locate the Clock present on the rear right corner of the screen.
  2. Tap it once.
  3. Press on the gear-shaped option that shows up on the panel.
  4. Now slowly scroll downwards towards the Device subhead.
  5. Locate and press on the keyboard key.
  6. You will now receive the compilation of keys you can personalize:
  7. The Assistant key (Pixelbooks exclusive)
  8. The Launcher key (also known as the Search key)
  9. The Escape key
  10. The Ctrl key
  11. The Backspace key
  12. The Alt key
  13. You can reassemble one of the following options to the keys:
  14. Launcher (the Chrome OS app drawer and search prompt)
  15. Assistant (on devices with Google Assistant)
  16. Caps Lock
  17. Alt
  18. Escape
  19. Ctrl
  20. Backspace
  21. In order to remap any key, you need to tap on the box beside it.
  22. Choose the function you want to assign to the key.
For instance, you can change the Launcher key to a Ctrl. In case you would like to keep the Launcher key, you can assign any other key to avail of the Ctrl option. If you own any other Chromebook than Pixelbook, then you would know that the device has a dedicated key for Google Assistant. You can gain easier access to the Assistant by assigning the Launcher Key or even an Escape key for the function.
The most notable keyboard function you make like to notice is, “Treat top-row keys as function keys.” The key is located under the compilation of customizable keys. If the key is activated, then all the special keys on the top row – the going back commands, page reloading, window maximization, etc. – will go back to the standard F-keys style. You can still gain access to the special keys; however, now you would have to press down the Launcher key first. This would unlock all the special keys for you to function.
Daisy Martin is an avid technical blogger, a magazine contributor, a publisher of guides at norton.com/setup and a professional cyber security analyst. Through her writing, she aims to educate people about the dangers and threats lurking in the digital world.

How to Unlock Netflix via VPN

Netflix is among the best platform to get your daily dose of entertainment. Be it drama, thrill, comedy, or action, Netflix has it all. The streaming giant is available in many countries around the globe; however, there are countries where Netflix is not accessible. As you may already know that a VPN can help you use Netflix regardless of your location.
So how can you avail it, and how can you effectively utilize it? Well, do not worry too much as we will help you out. This blog will cover tips for you to figure out how to access Netflix using a VPN service. VPN lets you safely access various networks across the globe. It even goes to encrypt your data, so it does not fall prey to violators.
  • Select a VPN Service Proven for Netflix Unblocking
You cannot rely on every VPN service to be able to unlock Netflix for you. Although every VPN claim to do so, in reality, only some of them can. Dig out the details regarding your VPN selection and only then opt for one. You need to keep the following factors into consideration while choosing one:
  1. Unrestricted streaming bandwidth.
  2. Quick protocols for streaming.
  3. A trial period that lets you test out their service.
  4. A decent history of unblocking Netflix.
Some services only unblock Netflix in certain areas, so you should check them out before finalizing one.
  • Sign up and try out the VPN
After choosing the VPN, you need to sign up there to access Netflix. Luckily, the majority of the VPN services offer a free trial period for its users. Test out the performance and cancel out if you are not satisfied with them. There are services that require you to contact the company in case of cancellation. You need to offer genuine issues to cancel the services. VPNs might even ask for credit cards; however, they will not charge you before the trial period runs out.
  • How to access Netflix with VPN
Follow the provided steps thoroughly to enjoy Netflix via a VPN:
  1. Download a compatible app of your VPN.
  2. Install the application after following the on-screen instructions.
  3. Provide necessary permissions to the service.
  4. Every VPN uses a different interface, but you will most likely see a list of various available countries.
  5. Choose any country that lets you access Netflix.
  6. Log in on the Netflix server.
  7. Sit back and enjoy your favorite shows.
Make sure to pick a reliable VPN and try to choose a country closer to your current location. Pick a VPN with decent reviews and apply common sense to avoid any sketchy VPN distributor.
Daisy Martin is an avid technical blogger, a magazine contributor, a publisher of guides at office.com/setup and a professional cyber security analyst. Through her writing, she aims to educate people about the dangers and threats lurking in the digital world.

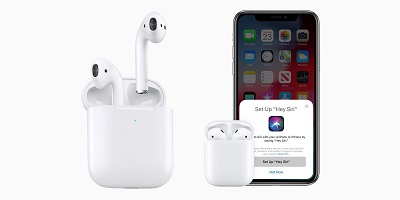
How to Ensure AirPods’ Connectivity

Apple has always been associated with esteemed performance and premium products. One of the most successful products by Apple is AirPods. The wireless earbuds were released back in 2016 and have been among the most demanded Apple products all over the world. Their demand is reasonable as they facilitate simplicity and facilitate several key features for the users to capitalize on.
You can filter out background noises, pick phone calls, and even connect to Siri via them. You can connect the AirPods with your iOS device via establishing a Bluetooth connection among them. AirPods are built to offer top-notch performance, and being an Apple product, the same is expected from them as well. However, if, for any reason, your AirPods are unable to connect to your macOS or iOS device, then you can opt to follow the mentioned instructions.
  • How to ensure AirPods’ connectivity with the iOS devices
The majority of the users connect their AirPods with iOS devices like iPhone, iPad, or iPod. The first thing you need to ensure that your iOS device has the iOS 10 update in the case of original AirPods and iOS 12.2 in the case of the 2nd gen AirPods. Obviously, a system update above the mentioned ones is even better.
Here is how you can connect the AirPods to any iOS device:
  1. Switch ON the Bluetooth for your device from the Control Center.
  2. Put the AirPods in the case and ensure that they are charging.
  3. Verify AirPods as the preferred audio device on your iOS device.
  4. Close the case lid for around twenty seconds and wait.
  5. Open the case, and if you see a white light flashing, then the AirPods can be connected.
  6. If you do not see the light, then press the setup key from the back of the case.
  7. Hold the button down until the light starts flashing.
  8. Open the case while keeping the AirPods inside, and put it beside the iOS device.
  9. Read the instructions regarding AirPods connection and follow them thoroughly.
Verify if they are functioning or not and enjoy it.
  • How to Connect AirPods to Mac
Follow and ensure the presented steps to effectively connect AirPods to macOS devices:
  1. Ensure your Mac device has macOS Sierra or higher for original AirPods.
  2. The requirement changes to macOS 10.14.4 or higher in the case of AirPods 2nd Gen.
  3. Launch the Apple menu on your Mac.
  4. Tap on System Preferences.
  5. Locate Bluetooth.
  6. You should see the AirPods option in there.
  7. Put the AirPods inside the charging case.
  8. Open the case lid and place it next to your Mac device.
  9. Repeat the steps up to the fifth one.
  10. Select AirPods.
  11. Tap Connect.
Check whether they work or not. If not, then you need to reset them.
  • How to reset the AirPods
It does not matter what devices you are using; resetting your AirPods can fix it all. Follow the mentioned steps to reset them:
  1. Open the Settings tab under the iOS devices.
  2. Select Bluetooth.
  3. Choose the information option (i) on AirPods.
  4. Choose Forget The Device.
  5. Confirm it.
  6. Repeat the connection process as mentioned above, and establish a working connection.
Daisy Martin is an avid technical blogger, a magazine contributor, a publisher of guides at norton.com/setup and a professional cyber security analyst. Through her writing, she aims to educate people about the dangers and threats lurking in the digital world.

McAfee Vs. Kaspersky Internet Security

  McAfee and Kaspersky are well-known names in the antivirus circle. It’s not wrong to say that they can be considered giants in the online ...