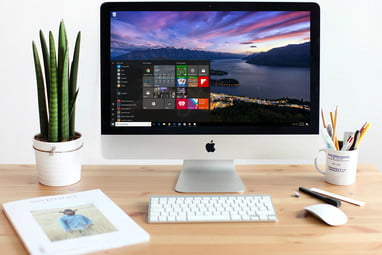
Mac Mini is a compact desktop with an amazing processor. It comes with eighth-gen Intel quad core and 6 core processors. As the name suggests, it is small in size and houses components present in laptops. If you wish to use Windows 10 on your Mac mini, then here’s how you can do so using an external drive.

Software Needed
Follow the instructions given below.
- First of all, go to thesite for Windows 10 Download.
- After that, you should choose Windows edition.
- Then click on Confirm.
- Thereafter, you have to choose your desired language.
- You should click on Confirm.
- Select Download.
- After this downloading will start.
Download Free 30 Days Trial of VMware Fusion
You need to download the free trial of 30 days of VMware Fusion. Follow the instructions given below.
- You have to visit the VMware Fusion website.
- Then click on Download Now.
Install Win-to-USB
- You have to visit the Win-to-USB website.
- Then you should choose Upgrade to purchase a license.
- Thereafter click on Download.
Get the Windows Support Files for Boot Camp
- Navigate to the Spotlight and begin Boot Camp Assistant.
- Then you should go to the menu bar, click on Action.
- Choose Download Support software.
- Now, select a Download location & click on Save.
Now, the Set-Up Process Will Begin with the External Drive
- Get started by connecting the external drive to the MacBook.
- Then you should go to the Spotlight & begin Disk Utility.
- Choose External Drive.
- Thereafter, you have to click on Erase.
- You should give a name to Boot Camp.
- Check the format. It should be Mac OS Extended.
- Check the Scheme. It should be GUID Partition Map.
- Now, click on Erase.
Get VMware Fusion
- To get started, twice click on DMG file.
- Next, you should twice click on the Installer.
- Then input the Password.
- Thereafter, you have to accept the agreement & choose “try VMware Fusion for 30 days”.
- You should make one New Virtual Machine.
- Move & place the Windows ISO file in VMware Fusion Window.
- Now, click on Continue.
- You should choose the Windows Version.
- Thereafter click on Continue.
- Select Continue without the key.
- Later, you should choose More isolated.
- Click on Continue.
- Now, click on Finish.
- Select Save.
- Give the necessary permissions
Windows 10 VM
- First & foremost select the settings Icon to open VM Settings.
- You should click on USB and Bluetooth.
- Then check the external drive.
- Later, click on, OK.
- Go to the Windows Icon & right-click on it.
- Choose Disk Management.
- Navigate to the connected drive’s Primary Partition and right-click on it.
- Choose Delete Volume.
- Thereafter, you should click on Yes.
- Go to the brand-newUnallocated partition, right-click on it.
- Later, you should choose New Simple Volume.
- Now, click on Next.
- Select Next again to confirm.
- Click on Next once more.
- Modify the Volume Label and change it to Boot Camp.
- Later, select Next.
- Now, click on Finish.
Connect the Windows ISO to the Windows 10 VM
- Navigate to the menu bar, choose Virtual Machine.
- Then select CD/DVD SATA.
- Select Disk or Disk Image.
- Choose the Windows 10 ISO you downloaded.
- Click on Open.
- Go to the menu bar, choose Virtual Machine.
- Select CD/DVD SATA & choose Connect CD/DVD.
Drag Files into the VM
- Move & place the WinToUSB_Free.exe file.
- Then you should move & place the WindowsSupport file.
Installing Win-to-USB in the Windows 10 VM
- Twice click on the WinToUSBFree.exe.
- Go with the selected language & install Win-to-USB.
- Next step, you should twice click on Win-to-USB.
- When you purchase a License to install October 1809 update, click on Upgrade now.
- Then input the license key & click on Register.
- Reboot Win-to-USB.
- Choose the CD/DVD icon.
- Go to the list & choose the connected Windows 10 ISO.
- Choose the desired Windows 10 version you install.
- Click on Next.
- Navigate to the list, choose the attached drive.
- Choose the partitions.
- Click on Next.
- Now, click on Exit.
Select the WindowsSupport files by going to the Boot Camp & copy them. Move them to the freshly upgraded Windows partition present on the external drive.
- To begin with, launch File Explorer.
- Then go to the Boot Camp E:\ drive.
- Drag the files on to the Boot Camp E:\ drive.
Shut Down the VMware Fusion
- Choose Virtual Machine.
- Then select Shut Down.
Modify MacBook OS
- First, you have to launch System Preferences.
- Then choose Startup Disk.
- Select Lock.
- Input the Password.
- Choose Boot Camp Windows.
- Click on Restart.

No comments:
Post a Comment