Wednesday, May 29, 2019

How to Keep Your Android Phone’s Screen On For Any App

Most of the Android devices, today, offer the default screen timeout of 30 seconds. It is suitable for extending the battery life and ideal when you don’t want your phone’s screen to stay awake for a long time. But sometimes it becomes necessary to keep the screen on for a more extended period. You will have to press the power button, again and again, to turn on the phone to keep it awake. In that case, you can use the Settings app on your phone for enhancing the screen time.
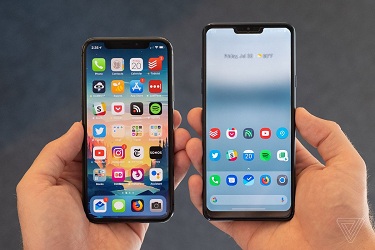
android phone.jpg
Firstly, go to Setting and then tap on Lock screen & password. From here, you can manage the screen turn off time ideally. Though, if you are not satisfied with it, you can choose to download specific apps made for this purpose only. Let’s have a look at them:
1. Keep Screen On
One of the most simple apps for keeping the screen on is the Keep Screen On app. You can easily download and install it from the Google Play store. Once you get it in your Android device, turn on the dedicated option given for keeping the screen awake. No need to worry about setting the time. There are no ads in this app, which makes it ideal for using as well.
2. Stay Alive
Another great alternative is the Stay Alive app. You might download it as a dedicated app, but it doesn’t have a proper interface. Once you give the asked permissions in this app, you get the option to access the settings through the notifications section. The best thing is you can select particular apps in it. But, for that,  you will have to upgrade to the pro version of this app.
3. Backlight Manager
Backlight Manager comes as a free app, which offers excellent backlight options. Download this app from the play store and toggle on the “Keep backlight on” option to use the feature. You can even add the backlight management widget on the home screen. This app also allows you to keep the backlight of the keyboard turned on permanently. Though, the feature is compatible with a few selected phone models only. No ads are there in the app too.
4. Wakey
Keep your phone’s screen on for a few particular apps with the use of Wakey. It provides you great control and is being offered as a simple and easy-to-use app. However, its free version doesn’t let you use all the features entirely and supports ads as well. If you don’t want ads in this app, you can choose to upgrade the app by paying the demanded amount. You must know that this app will not work for you if you own a Xiaomi Smartphone. Get this screen awake app from the Google Play Store for using it.
So, choose any of the above apps for keeping the screen on of your Android device. They can be downloaded and installed easily through the Google Play Store app on your Android phone!
Related article :
Kellie minton  arrived on the cyber security scene in the early 2000s when virus and malware were still new and slowly evolving. Her longtime affair with writing with an interest in the cybersecurity industry, combined with her IT degree, has contributed to experience several aspects of security suite industry such as blogging at norton.com/setup.

How to Replace the Windows 10 Default Browser

You must know that Microsoft provides a whole new web browser to the Windows users while launching Windows 10. The name of that browser is Microsoft Edge. It is considered as a fast and lightweight browser, but you can change it if you want. The method of changing the Windows 10 default browser is given below for you.
window 10
Through using the Settings app
1. Go to the Start section and choose the ‘gear’ icon from the there.
2. You will visit the Settings app on your Windows 10 device.
3. Choose Apps option now.
4. Then, move ahead with the process by selecting the Default apps option.
5. Keep scrolling down till you see the Web browser option.
6. Click on the default browser that is featured there.
7. Choose the desired new browser from the list of options on your screen.
Through Microsoft Edge
1. Go to the top right section of your Microsoft Edge browser and click on the icon that has three dots.
2. From the available options, choose Settings.
3. Now, click on the Change my default option right below Default browser in the General panel.
4. You will go to the Settings app. Click on Web browser option shown over there.
5. Then, choose the ideal browser that you wish to use accordingly.
Through Google Chrome
1. Find the three-dot icon in the Google Chrome browser and click on it.
2. Next, select Settings from the drop-down menu on the screen. You can even type in chrome://settings in the URL bar to go directly to the settings section.
3. Point the mouse below to see the Default browser option.
4. You will see the Make Default button next to it, click on the same button.
5. In the Settings app, the Web browser option will be there for you. Click on the available option to change the browser.
6. Various web browsers will be displayed to you, select the ideal one for you.
Through Mozilla Firefox
1. Go to the top right side in the Mozilla Firefox browser and click on the icon with three horizontal lines.
2. Next, choose Options from the available menu. You can go directly to the dedicated page by entering “about:preferences” in the address bar.
3. You will see General Page on the screen and the Make default option in the middle. Click on it.
4. From the Settings app, click on the browser available under the Web browser section.
5. Click on any new browser to make the default browser of your Windows 10 PC.
Through Opera
1. Launch the Opera web browser and go to the left section. You will see the red-colored Opera logo, click on that logo.
2. Under the Developer option, in the displayed drop-down menu, there will be the Settings option. Click over there.
3. Now, go the Default browser option and hit the Make default button.
4. In the Settings app, find the Web browser option and click on the browser displayed.
5. There will be various browsers in the pop-up window, choose the best one according to you.
Through Vivaldi
1. Open the Vivaldi browser and visit the top left section of the browser to click on the Vivaldi logo.
2. Select Tools option from the shown menu and then Settings.
3. Find the Set as Default option over there in the Vivaldi Settings General display window.
4. Go to the Web browser section available in the Settings app.
5. Hit the current chosen browser to select a new one from the list.
In this way, you can easily replace the default browser in your Windows 10 computer!
Related Article :
Kellie minton is an avid technical blogger, a magazine contributor, a publisher of guides at mcafee.com/activate and a professional cyber security analyst. Through her writing, she aims to educate people about the dangers and threats lurking in the digital world.

How to Use “Photos Of You” on Instagram

Well, Instagram is all about photographs, and it could be really handy for an individual to know some basic features that Instagram provides its users to ensure the protection of their personal information.
instagram
Whenever someone tags you in their photos, Instagram automatically posts that picture on your account under Photos of you section, which could be viewed by any individual on Instagram as the default settings are set to public.
Although it is not possible to stop your mates from tagging you in their pictures, still Instagram does provide some essential features to administer such photos and allows an individual to choose if they want their tagged photos to be public or not.  Users can refer to the steps mentioned below to customize their privacy settings and manage who can view their photos and who cannot.
Photos Of You
  • To customize your Photos of you settings, users will have to launch their Instagram app and head to their profile.
  • Now select the “Photos of you” option from the extreme right of your profile page which would display all the pictures that your friends have tagged you in.
  • Your tagged images will initially load in a grid style, but a user can simply select the desired picture to bring it to a standard size to view who has tagged them in the picture alongside the comments and likes.
  • Users can press the three line option adjacent to the picture to choose from a number of options like remove the tag, delete the photo from the account, share to and much more.
One could easily use this feature to customize their tagged pictures by using the Photos of you feature. If an individual wants to hide the photo, they are tagged in; then they can refer to the steps mentioned below.
  • Select the “Photos of you” feature from your Instagram profile page.
  • Now choose the desired picture from your tagged photos that you want to hide from your profile for public viewing by tapping on it.
  • Now select the “Menu” from your smart device.
  • And then press the “Photo Option” which would redirect you to a new menu.
  • Now Android users are required to choose the “Remove Tag” option to hide the photo from their profile. iPhone users will have to choose “Remove Me from Photo” to remove the tagged picture from their Photos of you page.
Hide from my profile
Users can also simply hide the tagged photo from their Instagram account by choosing “Hide from my profile” to only remove the picture from their account while keeping their name tagged with the photo.
Android users can also remove the picture from their profile instead of deleting the photo and tag from there profile by merely toggling on the “Keep in Photo of You” button. By following the steps mentioned above, Instagram users can easily customize their tagged photos and make their Instagram profile much more presentable.
Related article :
Kellie Minton is a qualified IT engineer by education. After working in the IT sector for a decade, she began writing about it two years ago. She loves to write about emerging technology like www.office.com/setup.

Tuesday, May 28, 2019

How To Uninstall Razer Synapse on Windows PC

The majority of gaming hardware brands provides their customers with special utility software’s which help the user in linking and customizing their different devices to perform according to their desire.
razer synapse.jpg
Let it be DPI, mouse RGB lighting, or keyboard RGB combo. Users can easily customize their devices as per their needs and usage, making gaming interactions much more fun.  Synapse software allows Razer device users to pair all their hardware at a single destination where a user can easily sync all the devices by implementing there desired settings and usage.
Uninstall Razer Synapse
Uninstalling Razer Synapse sometimes end up being a significant challenge as this software is considerably tricky to uninstall as it leaves some additional files behind even after completing the uninstallation process properly. So if you are looking for some means to uninstall Synapse from your PC, then follow the steps given below carefully.
  • First shutdown the Synapse program by right-clicking on the Razer Synapse logo and then choose the “Close Razer Synapse” from the prompted list.
  • Now head to the “Start” menu and select it.
  • And then hit the “Settings” option.
  • After that, choose the “Apps” option.
  • Now from the list of available options choose “Razer Synapse.”
  • Then select the “Uninstall” button and confirm the prompt window to initiate the uninstallation process.
After following the steps mentioned above thoroughly, users will be able to uninstall Razer Synapse from their computer. It is better recommended to restart your computer to remove any backup files related to the Synapse software. To restart your system follow the steps below.
  • Head to the “Start” menu.
  • Select the “Power logo.”
  • Now hit “Restart.”
How to completely remove Razer Synapse
If you still witness some files associated with Synapse software on your system files, chances are some of the junk and cache files are still present on your system. To altogether remove the software from your device go through the steps mentioned below.
  • Go to the “Start” menu.
  • Insert “regdit” in the search bar.
  • Now select “Registry Editor” app to launch it.
  • After that, choose the “Computer” option from the registry editor.
  • Then hit the “Edit” option from the action panel.
  • Now you are required to select the “Find” option from edit window which would pop-up search bar.
  • Insert ”Razer” in the search field and hit “Enter” key. It would present you with all the files associated with Razer Synapse software.
  • Now right click on all the files displayed and choose the “Delete” option to remove all the data from your device.
By following the steps accurately, users will be able to remove any of the existing files from their PC and uninstall the Razer Synapse program completely. Hopefully, all the users who want to uninstall the Razer software will be able to do so easily by following all the mentioned steps above.
Related article :
Kellie minton is an avid technical blogger, a magazine contributor, a publisher of guides at mcafee.com/activate, and a professional cyber security analyst. Through her writing, she aims to educate people about the dangers and threats lurking in the digital world.

Monday, May 27, 2019

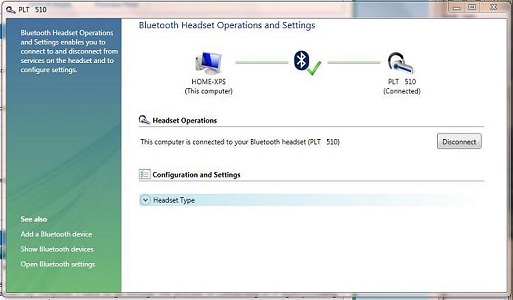
How to Connect a Bluetooth Device in Windows 7

Nowadays, Bluetooth is compatible with all smartphones, tablets, and laptop systems. In case you want to connect headphones, smartphones, speakers, or a mouse to the Windows 7 PC by using Bluetooth, then you can do it easily. In this article, you will get to know how to connect a Bluetooth device in Windows 7.
bluetooth connect.JPG
Allow both devices to be discoverable
•    Press on the Start menu symbol located at the end left-hand side of the display.
•    Additionally, you can open the start menu by clicking on the Windows key on the system keyboard.
•    After the Start menu gets open on display, you need to choose the “Devices and Printers” option given on the right-hand column.
•    You have to right-click on the name of the computer or laptop.
•    After that, click on the “Bluetooth Settings” button by going to the pull-down list.
•    Now, the “Bluetooth Settings” menu gets open on the screen.
•    Below the “Options” window, you need to go through the “Allow Bluetooth devices to find this computer” checkbox.
•    Press on the OK option to verify.
In case you are trying to pair an Android phone, then go through the  steps  given below, check your phone visibility:
•    Press on the Settings symbol provided on the Home screen to open the application.
•    Open the “Connected Devices” or “Devices Connectivity” window.
•    In case the Bluetooth is enabled, then you will receive a text which indicates that “your phone or tablet is now visible to nearby devices.”
In case you are using an iOS device, then go through the steps given below to check your phone visibility:
•    Click on the “Settings” symbol located on the home screen.
•    After the application gets open on the screen, go to the “Bluetooth” menu.
•    In case the Bluetooth is enabled, you will get a text indicating that “Now discoverable as (device name).”
In case you are trying to connect a system mouse, keyboard, speakers, then go through the user manual to get to know how to make your device visible.
Here’s how to connect a Bluetooth Device in Windows 7
•    Press on the Start option given at the end left-hand side of the display.
•    Otherwise, click on the Windows key on the system keyboard.
•    After that, choose the “Devices and Printers” option by going to the menu list.
•    After the “Devices and Printers” gets open on the screen, press on the “Add a device” option located at the upper left-hand side of the display. It is given under the “Back” and “Forward” options.
•    Now, your Windows 7 will find the nearby devices which you can connect to the system.
•    Choose any one device which you want to pair with your Windows PC.
•    After that, press on the “Next” option.
•    In case you are connecting a smartphone, then you will get a verification code which you have to type on the smartphone.
•    Verify your selection and let the Windows to complete the installation process of the important drivers.
•    Now, you have successfully connected a Bluetooth device in Windows 7.
Related article
Kellie minton is an avid technical blogger, a magazine contributor, a publisher of guides at mcafee.com/activate, and a professional cyber security analyst. Through her writing, she aims to educate people about the dangers and threats lurking in the digital world.

How to Play Sound Automatically in PowerPoint

In case you use PowerPoint, then you already know that you can create a presentation by adding music, sound effects, and other sound files in it. But do you know how to play sound automatically in PowerPoint?  In case not, then follow the instructions mentioned below to complete this procedure on your computer.
powerpoint.jpg
Here’s how to play sound automatically in PowerPoint from the beginning
•    Open the one slide of the PowerPoint presentation.
•    Press on the sound symbol given in the Standard view.
•    Press on the Playback menu located in the Audio Tools column.
•    Below the Audio Option, you need to go to the pull-down list near the “Start” menu.
•    After that, choose “Automatically” option.
•    In case you are using the most updated PowerPoint version, then you can select an option named as “In Click Sequence” by going to the pull-down list to get the same effect.
Steps to play sound automatically in PowerPoint from a Particular Slide
•    Same as the previous procedure, open a new slide on your PowerPoint when you wish to play the sound and after that, press on the Sound symbol provided in the Standard View.
•    Press on the Animation menu.
•    After that, press on the Add Animation option.
•    Select the Play option given in the media column.
•    Press on the Animation Panel given near the Add Animation option.
•    Reorder the things given in the Animation panel so that the sound file go on the top of the menu list.
•    Press on the downward arrow given near the sound file.
•    Click on the “Effect Options” button by going to the pull-down list.
•    Choose the “From Beginning” option below the  Start Playing option.
•    In the same menu, below the Stop Playing option, you need to select the “After Current Slide” option.
•    Press on the Timing menu given near the Start menu, you will get a pull-down list.
•    Press on the pull-down menu and after that, choose the option  named as “With Previous.”
•    In case you do not wish to play the sound when a new slide is loading on the PowerPoint, then you can choose a custom delay in the selected box.
•    Enter a time duration which you wish to pass before the sound starts playing.
•    In case you do not wish to delay the audio to start playing, then don’t enter any time duration on the section.
•    At last, press on the OK button to save and verify the changes you have made.
•    Press on the Slide Show menu again.
•    After that, select the “From Beginning” option to see a PowerPoint presentation and check to play sound automatically in PowerPoint.
Related article
Kellie minton  arrived on the cyber security scene in the early 2000s when virus and malware were still new and slowly evolving. Her longtime affair with writing with an interest in the cybersecurity industry, combined with her IT degree, has contributed to experience several aspects of security suite industry such as blogging at norton.com/setup.

Wednesday, May 22, 2019

How to Fix Major Bluetooth Issues in Windows 10

Want to play the game with your wireless Bluetooth controller on your Windows PC, but it fails to connect? Here is how to fix major Bluetooth issues in Windows 10. With these solutions, you will be able to connect any Bluetooth device to your Windows 10 computer.
bluetooth.jpg
Things you should try first
1.    Check whether the device supports Bluetooth
2.    Check whether the Bluetooth is On
3.    Make sure your Bluetooth device is working
4.    Check the enabled services or settings
5.    Use Bluetooth troubleshooter
6.    Update the Bluetooth drivers
Check whether the device supports Bluetooth
Check the specification of the device that you’re trying to set up with your Windows 10 PC. Read the product description to make sure that the device supports Bluetooth connectivity or not. Also, check the range and other specification of the Bluetooth. Some companies also tell how the gadget works and about its working conditions. This will help you to connect the Bluetooth device to your PC.
Check whether the Bluetooth is On
Bluetooth of both devices should be enabled to connect them. If any of one device’s Bluetooth is off, then they will not pair. So, make sure that the Bluetooth of your computer is turned on. To check or turn on Bluetooth on Windows 10 PC:
1.    Go to the ‘Start’ menu.
2.    Open the ‘Settings’ by clicking on the gear icon.
3.    On the settings window, Click on ‘Devices.’
4.    Then select ‘Bluetooth & Other devices.’ Clicking on it will open the Bluetooth settings and menu.
5.    Make sure the Bluetooth switch is turned on. From here, you can turn on or off the Bluetooth. When the Bluetooth is activated, a message saying “Now discoverable as [ComputerName]” display below the toggle switch.
6.    Try restarting the Bluetooth.
Some laptops have a separate switch for Bluetooth on its body, make sure the switch is on.
Make sure your Bluetooth device is working
•    Check the light or anything that indicates the device is on.
•    Make sure the battery of the Bluetooth device is charged.
•    Keep the Bluetooth device within the range of your computer’s Bluetooth. Both the devices should be within the range.
•    Try restarting your Bluetooth device. Turn your Bluetooth device off and keep it off for a minute, then turn back it on. This also helps in to identify whether the gadget is off or on.
Check the enabled services or settings
Airplane mode should be off:
Airplane mode prevents the Bluetooth from turning on. To check or turn off Airplane mode on your Windows 10,
1.    Go to the ‘Start’ menu.
2.    Open the ‘Settings’ by clicking on the gear icon.
3.    On the settings window, Click on ‘Network & Internet.’
4.    Select ‘Airplane mode.’
5.    Make sure the Airplane mode toggle switch is turned off. If Airplane mode is enabled, click the switch to turn it off.
Try removing the device, if already paired:
1.    Go to the ‘Start’ menu.
2.    Open the ‘Settings’ by clicking on the gear icon.
3.    On the settings window, Click on ‘Devices.’
4.    Then select ‘Bluetooth & Other devices.’
5.    Select the device from the Bluetooth section.
6.    Click ‘Remove device.’
7.    Then click ‘Yes.’
The device will be removed from your PC, now pair it again.
Use Bluetooth troubleshooter
Bluetooth troubleshooter finds and fixes the problem automatically. To run the troubleshooter,
1.    Go to the ‘Start’ menu.
2.    Open the ‘Settings’ by clicking on the gear icon.
3.    On the settings window, Click on ‘Update & Security.’
4.    Select ‘Troubleshoot.’
5.    Select ‘Bluetooth’ from ‘Find and fix other problems’ section.
6.    Click ‘Run the troubleshooter.’
7.    Then follow the screen instructions.
The troubleshooter searches for the problem and fixes them if it is possible for it.
These five solutions will fix the major Bluetooth issues in Windows 10. If these solutions don’t resolve the Bluetooth issue you’re facing, try updating the Bluetooth drivers of your Windows 10 PC.
Related article 
Kellie Minton is a qualified IT engineer by education. After working in the IT sector for a decade, she began writing about it two years ago. She loves to write about emerging technology like office.com/setup.

How to Troubleshoot Netflix Streaming Issues on Android Devices

Netflix is one of the most popular videos streaming service, but it doesn’t mean that it always runs smoothly. However, it also relies on internet connectivity, applications, and third-party hardware that may cause the service not works properly. Netflix streaming issue is one of the most common troubles that users encounter. If movies and TV shows are not playing on your Android Smartphone or Android tablet or are stuck on loading with a black screen, then try these troubleshooting solutions.
netflix.png
•    Reboot your Android smartphone or tablet
•    Erase the Netflix app data
•    Install the Netflix app again (Update)
•    Restart the internet connection or modem
•    Check your Wi-Fi signal
•    Try using another internet connection
Here is how to troubleshoot Netflix streaming issues on Android smartphones or Android tablets.
Reboot your Android Smartphone or tablet
Restarting works as first aid, restarting a device fixes most of the small and even some significant errors. Therefore, you should try restarting your first, if you’re facing the Netflix streaming error. Here is how to complete this easiest task.
1.    Place your finger on the power button of your Android device.
2.    Press and hold down the button, until the reboot menu will not appear on the screen.
3.    Confirm your action that you want to power off your device.
4.    When the device off completely. Press and hold down the button again.
5.    Remove your finger when the company logo appears on the screen.
6.    Allow your Android to boot up properly.
7.    Once it turns on completely, unlock your device, if it is locked.
8.    Now, launch the ‘Netflix’ app.
9.    Start playing a video and check if the streaming problem is solved.
If you’re still encountering the streaming issue, try the clearing app data.
Erase the Netflix app data
Erasing the app data of the Netflix app is simple. You can clear cache and app data right from your Android settings. Here’s how.
Note: Clearing the Netflix app data will erase your login, downloaded titles as well as other data from the app.
1.    Open Android Settings.
2.    Touch on ‘General.’ If there is no such option, then open ‘Apps or Applications.’
3.    Now, open ‘Manage Applications, Manage All Apps, Application Manager, or Download.’
4.    Scroll down and look for the ‘Netflix’ app.
5.    Tap on ‘Netflix’.
6.    Tap on ‘Clear Data’ Clear Storage.’ You may need to tap on ‘Storage’ first.
7.    Tap ‘OK.’
8.    After erasing the Netflix app data, close the Android settings.
9.    Now, open the Netflix app.
10.    Sign in with your Netflix account.
11.    Start playing a video and check if the streaming problem is solved.
Some Android devices don’t allow to delete Netflix app data. If you’re also unable to delete app data, continue troubleshooting with the below solutions.
Install the Netflix app again (Update)
Removing or uninstalling the Netflix app will remove the titles if you have downloaded to your device. Try updating your Netflix app if you don’t want to lose your titles, login, and other data. This way, you’ll not lose your Netflix titles or data as well as troubleshoot the Netflix streaming issue.
1.    Open ‘Play Store’.
2.    Search for ‘netflix’.
3.    Select the ‘Netflix’ app from the result.
4.    Then tap ‘Uninstall’ or ‘Update.’ If you’ve selected ‘Update,’ then the app will begin installing immediately, now you don’t need to follow the below steps.
5.    Tap ‘OK.’
6.    After uninstalling completes, tap ‘Install’ to install the Netflix again.
7.    When the app installed, tap ‘Open’ to start the app.
8.    Start playing a video and check if the streaming problem is solved.
Restart the internet connection or modem
1.    Turn off all the devices connected with your home network.
2.    Power off your Android device.
3.    Now, disconnect your modem or router from the power source.
4.    Wait for at least one minute.
5.    Connected your modem or router to the power source again and wait.
6.    Power on your Android device.
7.    Start Netflix and try playing a video.
Check your Wi-Fi signal
If you’re using the Netflix over a Wi-Fi network, try this.
•    Shift your router to a new place to improve the signal strength.
•    Keep other wireless equipment such as a microwave oven or cordless phones away from the router.
•    Make sure you’re using the Netflix within the Wi-Fi range.
These solutions will surely troubleshoot Netflix streaming issues on Android devices.
Related article 
Kellie minton is an avid technical blogger, a magazine contributor, a publisher of guides at mcafee.com/activate and a professional cyber security analyst. Through her writing, she aims to educate people about the dangers and threats lurking in the digital world.

McAfee Vs. Kaspersky Internet Security

  McAfee and Kaspersky are well-known names in the antivirus circle. It’s not wrong to say that they can be considered giants in the online ...