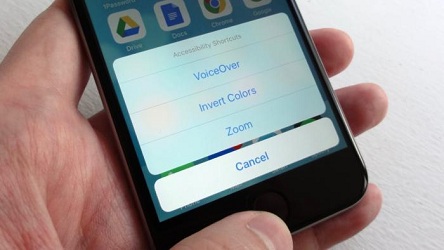
Switch Control is one of the greatest features in the iPhone and iPad, which permits limited mobility so that you can use your device through the switches and any other adaptive types of equipment. All the items on display get highlighted, and you can activate it by clicking, placing the selfie camera in front of you, or clicking adaptive switches. If you want to enable the Switch Control on iPhone and iPad, then follow the steps mentioned below.

Steps to Enable Switch Control
• Open the Settings tab given on the Home screen
• Press on the General option.
• Click on the Accessibility option.
• Click on the Switch Control button.
• Press on the switch given near to the Switch Control for turning it on.
Steps for Adding the New Switch
• Open the Settings option located in the Home screen.
• Click on the General option.
• Press on the Accessibility button.
• Press on the Switch Control option.
• Click on the Switches option.
• Click on the Add New Switch option.
• Press on the source button. Here are some of the sources mentioned below:
1. Camera. In case you wish to select the camera, then you need to also choose the actions for the Left Head Movement and Right Head Movement options.
2. Screen. You will need to choose the Full-Screen option.
3. External. Now, you need to start activating the external switch.
• Press on the switch action option.
• Press on the Long Press option for setting up the long press option.
• Press on the switch action option.
Steps to Remove a Switch
• Open the Settings option provided on the home screen.
• Choose the General option.
• Select the Accessibility option.
• Click on the Switch Control button.
• Press on the Switches option.
• Slide to the left-hand side on the switch which you wish to remove
• Press on the Delete option.
Steps to Make a New Recipe
• Open the Settings option by going to the home screen
• Press on the General button.
• Press on the Accessibility option.
• Click on the Switch Control option.
• Press on the Recipes option.
• Click on the Create new recipe button.
Steps for Changing Switch Control Scanning Style
• Go to the Settings option from the home screen.
• Press on the General option.
• Click on the Accessibility option.
• Press on the Switch Control button.
• Click on the Scanning Style option.
• Press on the Switch Control scanning style option.
Steps for Changing the Auto Scanning Time
• Go to the Settings tab.
• Press on the General button.
• Press on the Accessibility option.
• Press on the Switch Control option.
• Press on the Auto Scanning Time option given below the timing option.
• Press on the plus and minus options for adjusting the time.
Steps to Enable Pause Feature
• Click on the Settings symbol located on the Home screen.
• Press on the General option.
• Click on the Accessibility option.
• Press on the Switch Control option.
• Press on the Pause option.
• Click on the Switch option for turning it on.
Steps for Changing the loop numbers
• Press on the Settings option.
• Press on the General option.
• Click on the Accessibility button.
• Press on the Switch Control option.
• Click on the Loops option.
• Press on the Loop number.
Steps for Enabling the Move Repeat Feature
• Open the Settings tab.
• Click on the General option.
• Press on the Accessibility option.
• Click on the Switch Control option.
• Press on the Move Repeat option.
• Press on the Switch button for enabling the Move Repeat feature.
Related article
Kellie minton is an avid technical blogger, a magazine contributor, a publisher of guides at mcafee.com/activate, and a professional cyber security analyst. Through her writing, she aims to educate people about the dangers and threats lurking in the digital world.

No comments:
Post a Comment